
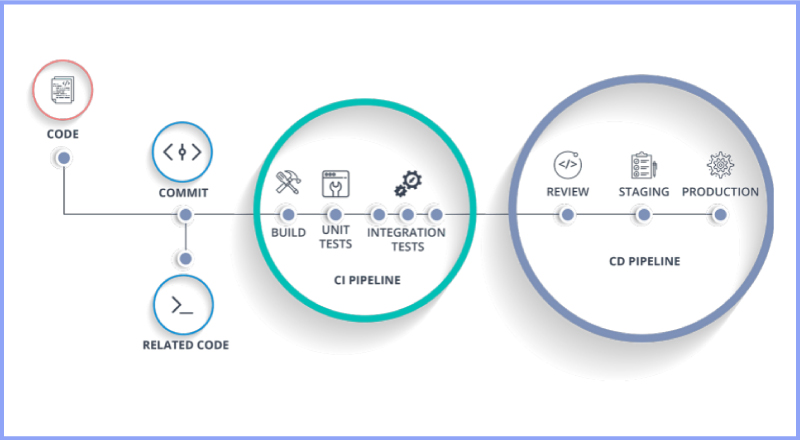
In the fast-paced world of modern software development, the speed of feedback is paramount. Continuous Integration and Continuous Delivery (CI/CD) pipelines are the lifeblood of agile teams, but they are only as fast as their slowest stage. For many Java projects, that bottleneck is the automated test suite. As applications grow in complexity, the number of unit and integration tests can swell into the thousands, turning a once-quick verification step into a lengthy coffee break. This is where the latest JUnit news becomes critical for developer productivity.
JUnit 5, the de facto standard for testing in the Java ecosystem news, introduced a game-changing feature to address this very problem: native parallel test execution. By leveraging modern multi-core processors, this capability allows developers to run multiple tests simultaneously, dramatically reducing build times and tightening the feedback loop. This isn’t just a minor tweak; it’s a fundamental shift in how we can approach testing efficiency, impacting everything from small microservices built with Spring Boot to large monolithic applications under the Jakarta EE umbrella. This article provides a comprehensive deep dive into mastering parallel testing in JUnit 5, covering core concepts, advanced configuration, practical code examples, and essential best practices to help you accelerate your development workflow.
Understanding the Core Concepts of Parallel Execution
Before diving into configuration files and annotations, it’s crucial to understand the principles behind JUnit 5’s parallelism. Unlike older solutions that often required third-party plugins or complex build script configurations, JUnit 5 integrates this feature directly into its platform engine. This provides a more robust, predictable, and configurable experience.
Why Parallelism Matters for Modern Java Development
The core motivation is simple: speed. A test suite that takes 20 minutes to run sequentially can potentially be completed in 5 minutes on a 4-core machine, assuming the tests are independent. This acceleration has a cascading effect on the entire development process:
- Faster CI/CD Builds: Reduced build times mean quicker feedback on pull requests, allowing for faster merges and deployments.
- Increased Developer Productivity: Developers can run full test suites locally more frequently without long waits, encouraging a test-driven development (TDD) workflow.
- Efficient Resource Utilization: Modern hardware is built for parallelism. Running tests sequentially leaves valuable CPU cores idle.
This performance boost is especially relevant in the context of recent Java 17 news and Java 21 news, where performance optimizations are a key theme. As the JVM itself becomes more efficient, our testing frameworks must keep pace.
Enabling Parallelism: The First Step
Activating parallel execution in JUnit 5 is surprisingly straightforward. It’s controlled via a configuration file named junit-platform.properties, which should be placed in your project’s src/test/resources directory. This is a central piece of Maven news and Gradle news, as build tools will automatically pick up this file during the test phase.
To enable the feature, you simply need to add one property:
# src/test/resources/junit-platform.properties
junit.jupiter.execution.parallel.enabled = true
With this single line, the JUnit Platform will switch from its default sequential execution model to a parallel one. By default, it uses a ‘dynamic’ strategy, creating a thread pool sized based on the number of available CPU cores. This simple change is often enough to see significant improvements in test execution time for projects with a large number of independent tests.
Fine-Grained Implementation and Configuration
While enabling parallelism globally is a great start, real-world projects often require more granular control. Some tests may depend on a shared, non-thread-safe resource, while others are perfectly suited for concurrent execution. JUnit 5 provides a powerful set of tools to manage this complexity.
Choosing a Configuration Strategy
Beyond simply enabling parallelism, you can specify how the thread pool is configured. This is done through the junit.jupiter.execution.parallel.config.strategy property.
- dynamic: (Default) The size of the thread pool is calculated based on the number of available processors/cores, multiplied by a factor. You can tune this with
junit.jupiter.execution.parallel.config.dynamic.factor. A factor of 1.5 on an 8-core machine would result in a 12-thread pool. - fixed: You specify a fixed number of threads for the pool using
junit.jupiter.execution.parallel.config.fixed.parallelism. This is useful for creating reproducible performance benchmarks or limiting resource consumption in a shared CI environment.
Here is an example configuration using a fixed thread pool of 8 threads:
# Use a fixed thread pool for consistent performance
junit.jupiter.execution.parallel.enabled = true
junit.jupiter.execution.parallel.config.strategy = fixed
junit.jupiter.execution.parallel.config.fixed.parallelism = 8
Controlling Concurrency with the @Execution Annotation
The most powerful tool for fine-grained control is the @Execution annotation. It allows you to override the default execution mode for a specific test class or even an individual test method. It takes one argument, ExecutionMode, which can be:
CONCURRENT: The annotated class or method is eligible to be executed concurrently with other tests.SAME_THREAD: The annotated class or method will be forced to run sequentially, respecting the parent’s execution lifecycle.
This is invaluable for isolating legacy tests or tests that interact with stateful, non-thread-safe components. Consider a class where most tests are pure and stateless, but one method modifies a global static variable.
import org.junit.jupiter.api.Test;
import org.junit.jupiter.api.parallel.Execution;
import org.junit.jupiter.api.parallel.ExecutionMode;

// This entire class will be executed concurrently with other test classes.
@Execution(ExecutionMode.CONCURRENT)
class MixedConcurrencyTest {

    // This test is thread-safe and can run in parallel with other methods.
    @Test
    void independentTestOne() throws InterruptedException {
        System.out.println(Thread.currentThread().getName() + " >> independentTestOne()");
        Thread.sleep(100); // Simulate work
    }

    // This test is also thread-safe.
    @Test
    void independentTestTwo() throws InterruptedException {
        System.out.println(Thread.currentThread().getName() + " >> independentTestTwo()");
        Thread.sleep(100); // Simulate work
    }

    // CRITICAL: This test interacts with a shared, non-thread-safe resource.
    // We force it to run in the same thread as the test class's lifecycle methods
    // to prevent race conditions with other tests within this class.
    @Test
    @Execution(ExecutionMode.SAME_THREAD)
    void statefulTest() throws InterruptedException {
        System.out.println(Thread.currentThread().getName() + " >> statefulTest() - MUST BE SEQUENTIAL");
        // Simulate interaction with a static, non-thread-safe utility
        GlobalStatefulService.setValue("test");
        Thread.sleep(100);
    }
}
In this example, independentTestOne and independentTestTwo can be executed in parallel by the JUnit engine, while statefulTest is guaranteed to execute in a more controlled, sequential manner relative to its class instance, preventing race conditions.
Advanced Techniques: Managing Shared Resources
The biggest challenge in parallel testing is managing shared resources. This could be anything from a file on the filesystem, a database connection, or system properties. Uncontrolled concurrent access to these resources leads to flaky tests—tests that pass sometimes and fail at other times, eroding trust in your test suite. This is a core topic in Java concurrency news.

Synchronization with @ResourceLock
To solve this, JUnit 5 provides the @ResourceLock annotation. This powerful feature acts as a declarative locking mechanism, allowing you to tell the JUnit scheduler that a test requires exclusive or shared access to a specific resource. The scheduler will then ensure that conflicting tests do not run at the same time.
The annotation requires a string identifier for the resource and an optional ResourceLockMode:
READ_WRITE(Default): Grants exclusive write access. No other test using the same resource lock (read or write) can run concurrently.READ: Grants shared read access. Multiple tests with aREADlock can run concurrently, but they will be blocked if a test with aREAD_WRITElock is running.
Imagine two tests that modify the same system property. Without synchronization, you have a classic race condition. @ResourceLock elegantly solves this.
import org.junit.jupiter.api.Test;
import org.junit.jupiter.api.parallel.Execution;
import org.junit.jupiter.api.parallel.ExecutionMode;
import org.junit.jupiter.api.parallel.ResourceLock;
import org.junit.jupiter.api.parallel.ResourceLockMode;

import static org.junit.jupiter.api.Assertions.assertEquals;

@Execution(ExecutionMode.CONCURRENT)
class SystemPropertyTests {

    private static final String SHARED_PROPERTY = "my.app.config.path";

    @Test
    @ResourceLock(value = SHARED_PROPERTY, mode = ResourceLockMode.READ_WRITE)
    void testSetsAndVerifiesConfigPathA() {
        System.out.println(Thread.currentThread().getName() + " >> Acquiring lock for " + SHARED_PROPERTY);
        System.setProperty(SHARED_PROPERTY, "/path/to/config/A");
        // Simulate some work that depends on this property
        try {
            Thread.sleep(200);
        } catch (InterruptedException e) {
            Thread.currentThread().interrupt();
        }
        assertEquals("/path/to/config/A", System.getProperty(SHARED_PROPERTY));
        System.out.println(Thread.currentThread().getName() + " >> Releasing lock for " + SHARED_PROPERTY);
    }

    @Test
    @ResourceLock(value = SHARED_PROPERTY, mode = ResourceLockMode.READ_WRITE)
    void testSetsAndVerifiesConfigPathB() {
        System.out.println(Thread.currentThread().getName() + " >> Acquiring lock for " + SHARED_PROPERTY);
        System.setProperty(SHARED_PROPERTY, "/path/to/config/B");
        // Simulate some work that depends on this property
        try {
            Thread.sleep(200);
        } catch (InterruptedException e) {
            Thread.currentThread().interrupt();
        }
        assertEquals("/path/to/config/B", System.getProperty(SHARED_PROPERTY));
        System.out.println(Thread.currentThread().getName() + " >> Releasing lock for " + SHARED_PROPERTY);
    }
}
With this setup, the JUnit scheduler guarantees that testSetsAndVerifiesConfigPathA and testSetsAndVerifiesConfigPathB will never run at the same time, even though the rest of the test suite is running in parallel. This prevents one test from overwriting the system property while the other is still using it. This is highly relevant for testing applications using frameworks like Spring Boot or Hibernate, where external configurations are common (Spring Boot news, Hibernate news).
Best Practices and Optimization

Adopting parallel testing is not just about flipping a switch; it requires a shift in mindset. To truly benefit, you must design your tests for concurrency from the ground up.
Key Best Practices
- Embrace Statelessness: The golden rule of parallel testing is to ensure tests are independent and stateless. Avoid static mutable fields and shared state wherever possible.
- Isolate Filesystems: Use JUnit 5’s
@TempDirextension to create a unique temporary directory for each test. This completely avoids file I/O conflicts. - Isolate Databases: For integration tests, use one in-memory database (like H2) per test class or leverage Testcontainers to spin up a dedicated database instance for each test run. This ensures complete data isolation.
- Start Incrementally: Don’t enable parallelism for your entire project at once. Start with a single module, fix any flaky tests that appear, and then expand. This makes debugging much easier.
- Use Locks Sparingly: While
@ResourceLockis powerful, overuse can create new bottlenecks and effectively serialize your test suite. Use it as a targeted tool for specific, unavoidable resource conflicts.
Common Pitfalls to Avoid
- Ignoring Flaky Tests: A test that fails 1 out of 100 times in parallel is a bug. It indicates a hidden race condition. These must be investigated and fixed, not ignored or re-run.
- Shared Mocking State: Be careful with mocks created with frameworks like Mockito. If a mock is defined in a static field and shared between tests, it can lead to unpredictable behavior when tests run in parallel. This is important Mockito news for concurrent testing.
- Forgetting About Downstream Systems: If your integration tests call a shared, stateful downstream service, running them in parallel can cause chaos. Ensure any external dependencies can handle concurrent requests or use locks to serialize access.
These principles are timeless in the Java world, echoing sentiments from Java 8 news to the latest discussions around Project Loom and Java virtual threads news, where managing concurrency and state is a central theme.
Conclusion: A New Era of Testing Efficiency
JUnit 5’s parallel execution feature is a transformative addition to the Java developer’s toolkit. By moving beyond the traditional sequential model, it unlocks significant performance gains, leading to faster CI/CD pipelines, tighter feedback loops, and ultimately, higher developer productivity. The true power lies in its flexible configuration, allowing teams to start with a simple global switch and progressively add fine-grained controls like @Execution and @ResourceLock to handle the complexities of a real-world codebase.
The key takeaway is that writing parallel-ready tests should become the default mindset. By focusing on statelessness, isolation, and explicit synchronization where necessary, you can build a robust and lightning-fast test suite that scales with your application. As the Java performance news continues to evolve, leveraging every available CPU core is no longer an option but a necessity. We encourage you to open your junit-platform.properties file, enable this feature, and begin the journey toward a more efficient and responsive development cycle.